Mom’s Famous Homemade Cherry Pie
This post may contain affiliate links.
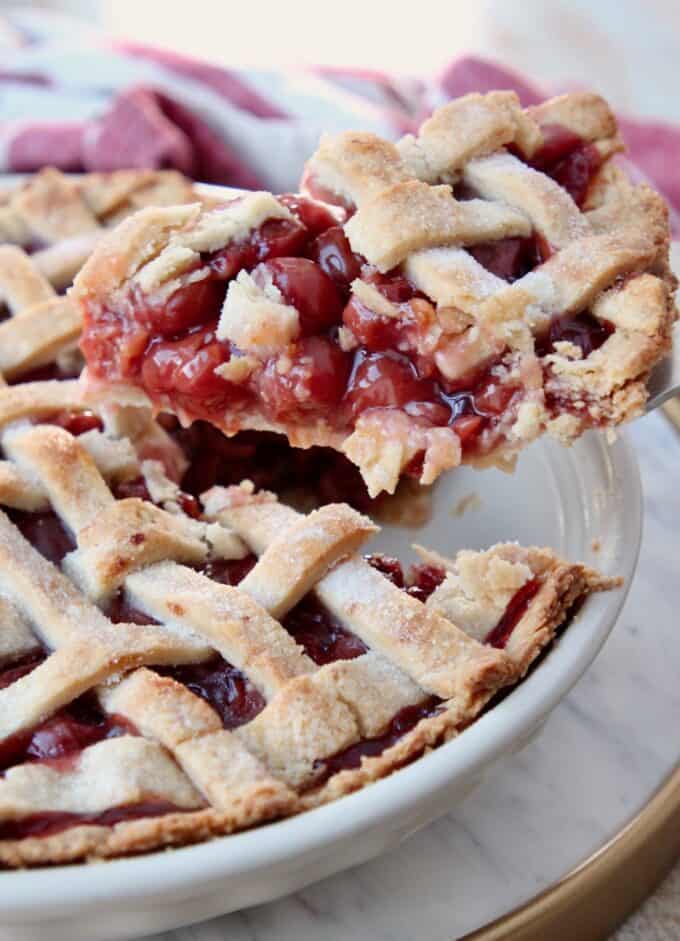
Mom’s Famous Cherry Pie recipe begins with the perfect crust, made from scratch. It’s filled with homemade cherry pie filling & topped with a simple lattice crust! The flavorful filling is both sweet and tart. It’s made with canned cherries for an easy filling, that’s also totally delicious!
At my parents house, we serve this pie from Valentine’s Day, to 4th of July, to Thanksgiving! It’s the perfect pie to share with friends and loved ones at holidays or any get-together!
Growing up, my Dad did most of the cooking around our house, but my Mom was definitely the baker. From chocolate chip cookies, to brownies, to pies, my Mom was always whipping up a sweet treat for holidays, parties and school functions!
Of all the desserts she makes, my Mom is most famous for her pies! From her Strawberry Pie in the summer, to Pecan Pie in the fall, everyone gets so excited when Mom’s making pie!
A pie that is made year-round in our house is her cherry pie. It’s my Dad’s favorite pie and always on the menu for his birthday. And you better believe, there’s always one around during the holidays!
From the pie dough that my grandma taught her to make from scratch, to the sweet, tart homemade filling, this pie is both beautiful and delicious! I promise that it’s worth the time and effort to make this scrumptious pie from scratch.
Table of contents
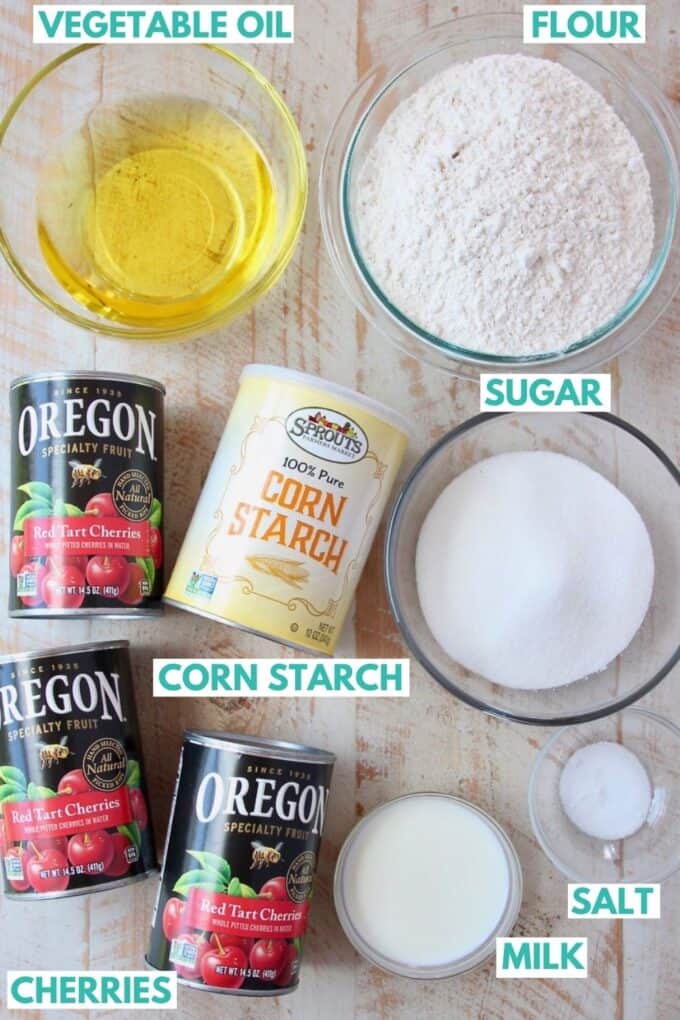
Ingredients you’ll need
- For the pie crust:
- Flour
- Vegetable Oil
- Milk
- Salt
- For the filling:
- Canned Pitted Tart Cherries (packed in water) – these can generally be found in the baking section at most grocery stores or on the canned fruit aisle. If you can’t find them in store, you can always order them online at the link provided.
- Sugar
- Cornstarch
How to make pie crust
One of the keys to making my Mom’s famous cherry pie, is making the pie crust from scratch, using the techniques that my grandma taught her. Don’t worry, it’s simple and once you’ve got it down, you can use this pie crust recipe for every pie you make, just like we do at home!
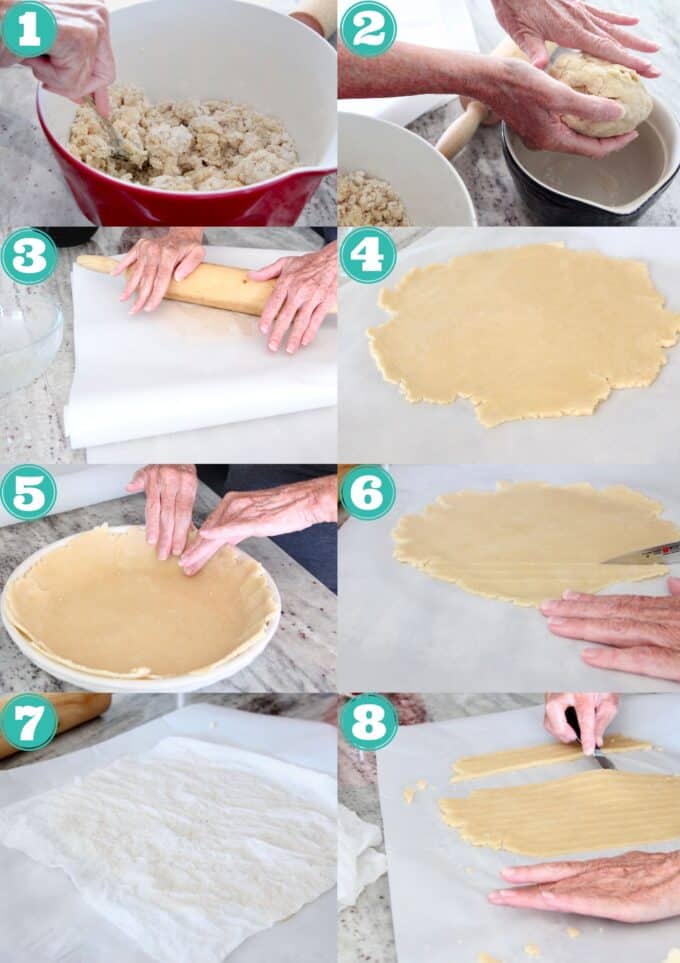
- Sift flour into a large mixing bowl, add salt and combine. Mix vegetable oil and milk together in a separate bowl. Add the wet mixture to the dry mixture and stir together, until the dough goes from crumbly, to a solid ball.
- Divide the dough in half. Place half of the dough in an oiled bowl and set aside.
- Place the other half of dough between two pieces of floured wax paper (preferred) or parchment paper. Use a rolling pin to roll the dough.
- Roll until it’s approximately 1/4 inch thick.
- Press the pie dough into a 9 inch pie dish, using your fingers to press the dough into the sides of the plate.
- Remove the other half of dough from the oiled bowl and place it between the two sheets of wax paper. Roll it to 1/4 inch thickness, using a rolling pin, then slice into approximately 1/2 inch slices.
- Cover the sliced pie crust with a damp paper towel, until ready to top the pie.
- When ready to top the pie, remove the paper towel and slide a knife under the lattice topping to make sure it does not stick to the wax paper, before removing it to top the pie.

How to make cherry pie filling
- Use a mesh strainer to strain the cherries from the juice in the can. Strain over a bowl, as you’ll want to reserve 1 cup of cherry juice for the filling. Set the strained cherries aside for later.
- Add the 1 cup of reserved cherry juice and cornstarch to a medium saucepan on the stove over medium heat.
- Add granulated sugar.
- Bring to a boil over medium heat, then stir continuously until the mixture is thick.
- Note: this will take some time, but it’s the key to making a cherry pie that’s not runny! You’ll probably spend 15-20 minutes hanging at the stove stirring this mixture. But I promise, it’s worth it for cherry pie perfection!
- Once the mixture is thick, remove it from the heat and add the drained cherries to the saucepan. Stir to combine.
- Pour the homemade cherry filling into the prepared pie crust.
How to make a lattice crust
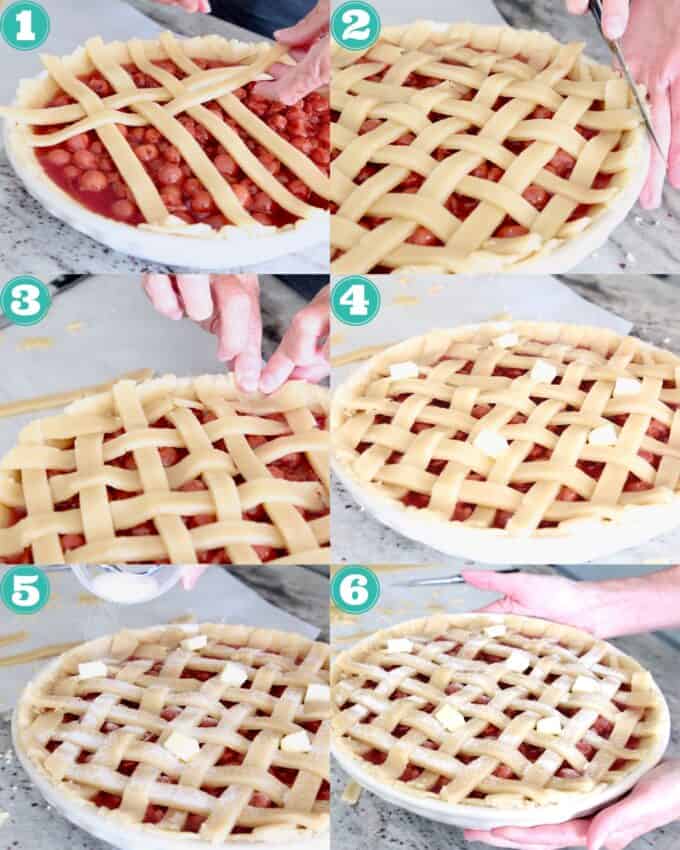
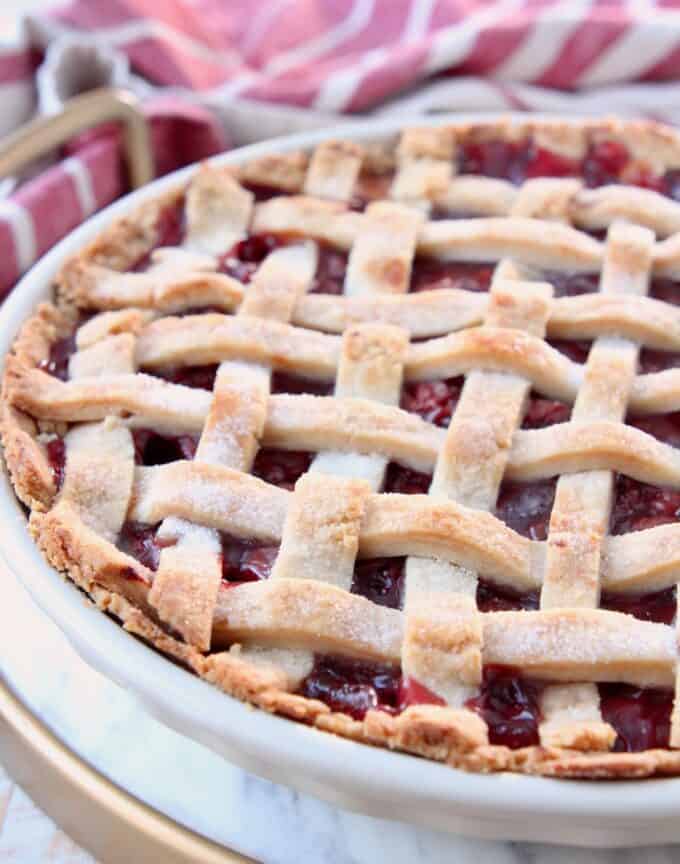
- Once the cherry pie filling is in the crust, grab the sliced pie crust that we set aside earlier. Lay 4 of the longest strips of dough side-by-side in the middle of the pie, each about 1/2 inch apart. Weave 4 more long strips of dough in the opposite direction, up and under the other pieces of dough. Continue adding and weaving more strips of dough up and under the other strips of dough until the top of the pie is covered.
- Use a sharp knife to trim any excess dough from the edges of the pie crust.
- Crimp the pie crust by pressing the top edge of the pie dough into the pie plate using your fingers.
- Place small cubes of butter across the top of the pie.
- Sprinkle granulated sugar evenly over the pie.
- Place the pie on a rack in the lower half of a preheated 450°F oven for 10 minutes. Reduce the heat on the oven to 350°F and bake for 45 minutes, or until the crust is golden brown.
- Mom tip! Always put a large baking sheet, lined with foil, on the rack in the oven under the pie. This will catch any bubbling over from the pie filling and keep your oven clean!
Tips and tricks
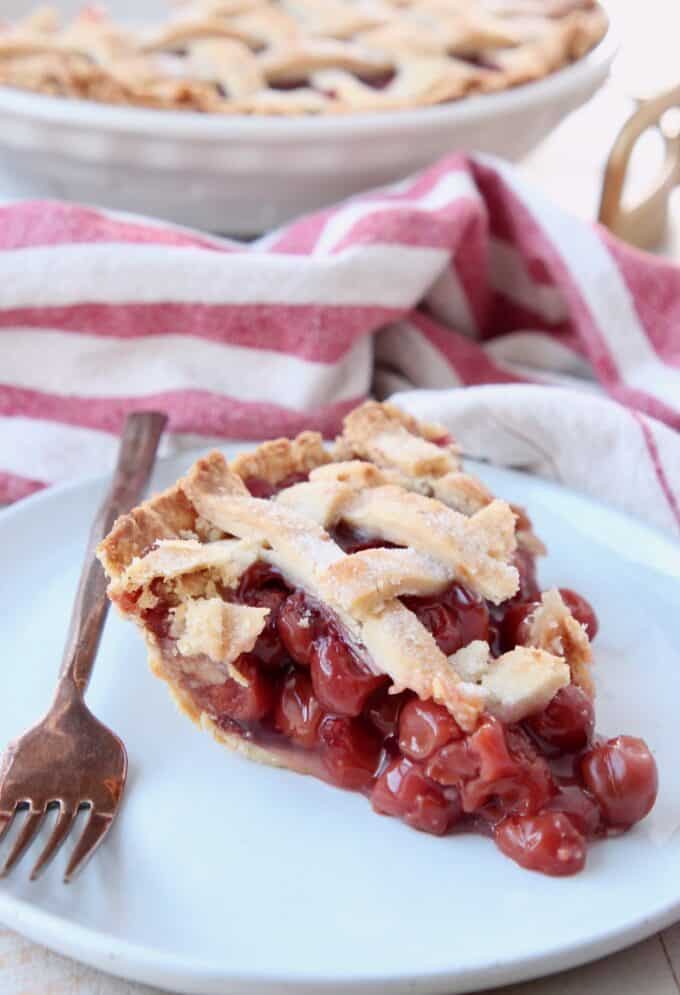
- Always wait to slice the pie! The hardest part of this recipe? Waiting at least an hour to slice into the pie after it comes out of the oven! I know it’s hard, but giving the pie time to rest means it won’t fall apart when you slice into it! Ideally, you’ll want the pie to come to room temperature before slicing, so this might take 2-3 hours.
- Looking to save time? Purchase store bought refrigerated pie crust. Use one for the pie crust and another for the lattice top. If you want to save even more time, you can skip the lattice crust and simply place the top crust over the cherry filling. Trim any excess around the edges, then use a fork to pierce a few holes in the top crust.
- Leftover pie will stay good at room temperature, covered tightly, for up to 3 days.
- You can also make 2 pies, eat one now and freeze one for later! The baked pie will stay good in the freezer for up to 3 months. To defrost, place the pie in the refrigerator for 24 hours. After 24 hours, remove it from the refrigerator, leave on the counter and allow the pie to come to room temperature before serving.
- If you want to prep the pie ahead of time, you can make the filling the day before preparing the pie. Let it cool to room temperature, tightly cover and place it in the refrigerator. The pie dough can be made 1-2 days in advance, store the pie dough, covered in the refrigerator.
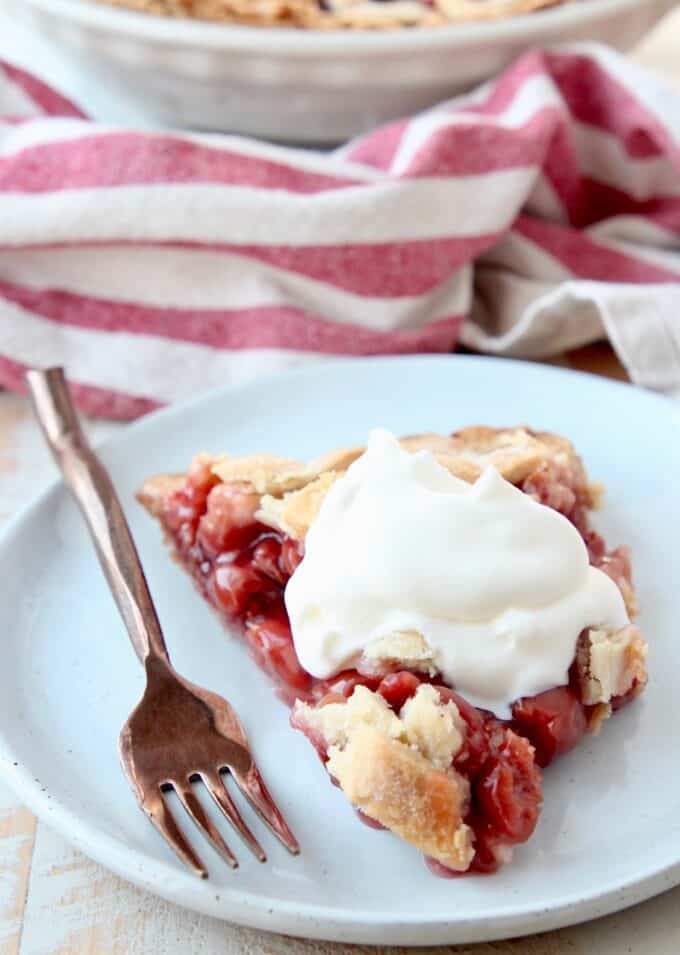
- Did someone say toppings? Yes, please! This cherry pie is delicious on it’s own, or with a dollop of homemade no churn ice cream or homemade whipped cream!
What type of cherries should I use?
My Mom’s famous cherry pie is always made with canned red tart cherries. Want to switch it up? Check out my recommendations below!
- If using dark, sweet cherries instead of tart cherries, reduce the sugar in the filling from 1 cup to 1/2 cup. Taste the filling and adjust according to your taste. Canned sweet cherries have more than double the amount of sugar, which is why I recommend reducing the added sugar in the filling.
- I do not recommend using sour cherries in this recipe.
- I do not recommend using fresh cherries. This recipe uses the liquid from the canned cherries to prepare the filling, therefore it will not work with fresh cherries.
- I also do not recommend using frozen cherries, as they don’t seem to hold their shape and texture as well as canned cherries. They also do not provide the liquid from the can to prepare the filling.
More Bond family recipes to try
I love sharing great recipes from my family archives on the blog. Check out a few of the most popular recipes from my Grandma Meme, Mom and Dad!
- Dad’s Famous Baked Beans
- Mom’s Famous Strawberry Pie
- Meme’s Chocolate Pie
- Dad’s Famous Captain Crunch Chicken Tenders
- Meme’s Pink Lemonade Pie
- Dad’s Famous Red Sangria
- Meme’s Cherry Coke Salad
Mom’s Famous Homemade Cherry Pie
Ingredients
Pie Crust
- 3 cups all purpose flour, sifted
- 3/4 cup vegetable oil
- 6 tablespoons milk, 2% or whole milk
- 1/4 teaspoon salt
Filling
- 45 ounces pitted tart red cherries, packed in water – 3 (15 oz) cans
- 1 cup granulated sugar
- 1/4 cup cornstarch
Cherry Pie
- 2 tablespoons unsalted butter, cut into small cubes
- 2 teaspoons granulated sugar
Instructions
Pie Crust
- To prepare the crust, sift the flour into a large mixing bowl.
- Add the salt and stir to combine.
- Mix the oil & milk together in a separate bowl.
- Add the oil & milk to the flour mixture.
- Use a fork to mix the ingredients together.
- Use your hands to form the dough into two equal balls.
- Place half of the dough in an oiled bowl and set aside.
- Place the other half of dough on a piece of floured wax paper.
- Place another piece of wax paper on top and use a rolling pin to roll the dough until it's approximately 1/4 inch thick.
- Press the dough into a 9 inch pie pan, using your fingers to press the dough into the sides of the pan.
- Place the bottom of the dough into the pie plate.
- Remove the other half of dough from the oiled bowl and place it between the two sheets of wax paper. Roll it to 1/4 inch thickness, using a rolling pin.
- To prepare the lattice top, slice the dough into 1/2 inch wide strips.
- Cover with a damp paper towel, then set aside and prepare the filling.
Pie Filling
- To make the filling, drain the cherries from the cans using a fine mesh strainer, reserving 1 cup of cherry juice.
- Combine the reserved cherry juice, sugar and cornstarch in a medium saucepan on the stove over medium heat.
- Bring to a boil over medium heat, stirring constantly until thick, about 15 minutes.
- Once the mixture is thick, remove it from the heat and add the drained cherries to the saucepan. Stir to combine.
Cherry Pie
- Preheat the oven to 450°F.
- Pour the homemade cherry filling into the prepared pie crust.
- Top with the lattice crust by carefully weaving the strips of dough over the filling.
- Lay 4 of the longest strips of dough side-by-side in the middle of the pie, each about 1/2 inch apart. Weave 4 more long strips of dough in the opposite direction, up and under the other pieces of dough.
- Continue with shorter pieces of dough as you work your way to the outside edges of the pie until the entire pie is covered.
- Use a sharp knife to trim any excess dough from the edges of the pie crust.
- Crimp the pie crust by pressing the top edge of the pie dough into the pie plate using your fingers.
- Place small cubes of butter across the top of the pie and sprinkle 2 teaspoons granulated sugar evenly over the pie.
- Place the pie on a rack in the lower half of a preheated 450°F oven for 10 minutes. Reduce the heat on the oven to 350°F and bake for 45 minutes, or until the crust is golden brown.
- After removing the pie from the oven, allow it to cool for at least 1 hour (preferably 2-3 hours) so that the pie comes out clean when it's sliced into.
Notes
- To prevent a mess in the oven – always put a large baking sheet, lined with foil, on the rack in the oven under the pie. This will catch any bubbling over from the pie filling and keep your oven clean!
- Store-bought pie crusts – can be used in place of homemade pie crust to save time.
- Leftover pie – does not need to be refrigerated. Simply cover it tightly and leave it at room temperature for up to 3 days.
- Make-ahead – the pie filling and dough can be made up to 2 days in advance. Cover tightly and store in the refrigerator until ready to make the pie.
- Cherries – I do not recommend fresh, frozen or sour cherries for this recipe. If using sweet cherries instead of tart cherries, I recommend reducing the sugar in the filling to 1/2 cup.
Nutrition Facts
We are a participant in the Amazon Services LLC Associates Program, an affiliate advertising program designed to provide a means for sites to earn advertising fees by advertising and linking to amazon.com.


